|
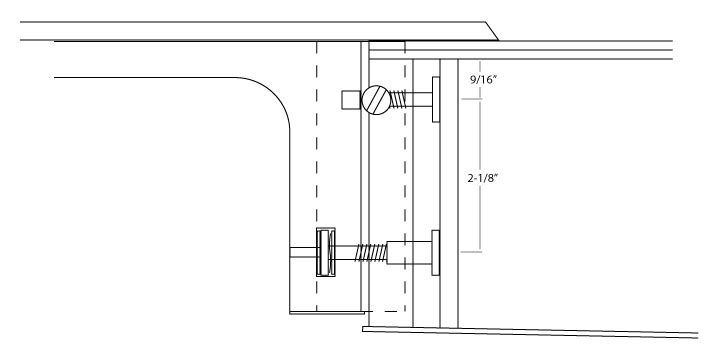
Here is an x-ray diagram of the neck block and neck fittings:
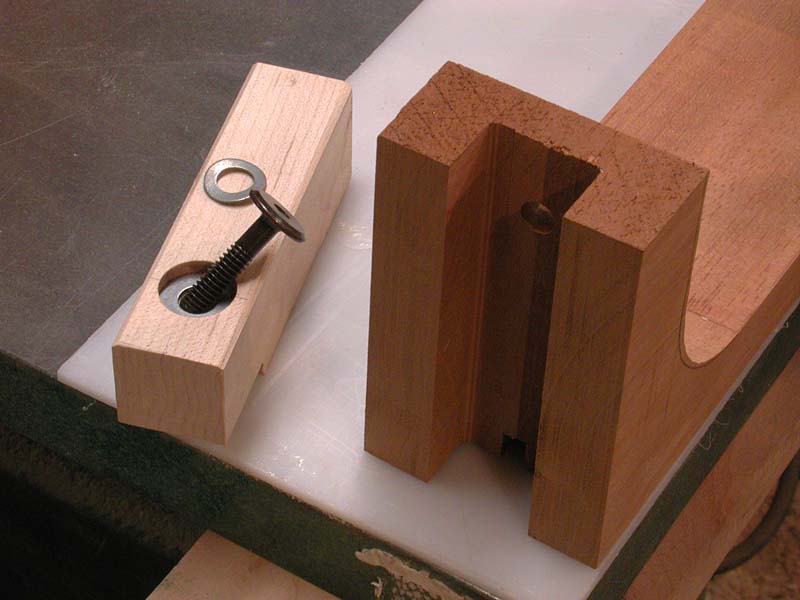
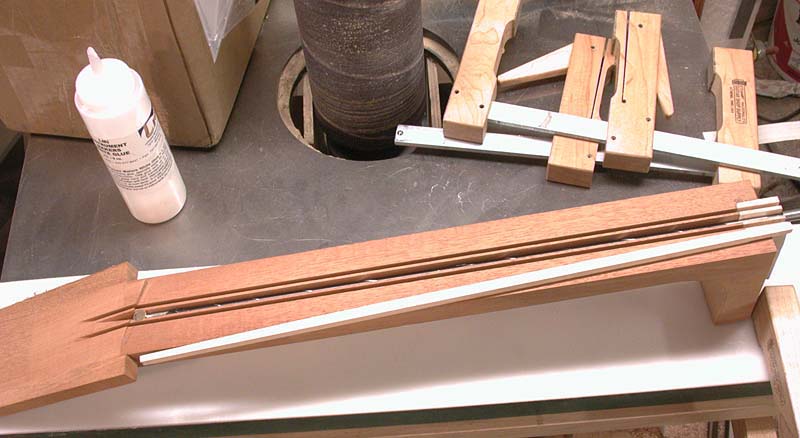
Here is the neck spline ready to glue into the mortise in the neck. The bolt will be accessed through the hole drilled in the heel. The recess hole drilled for the bolt head and washers is shallow enough that the wavy washer will be compressed when the spline is clamped in place. That will keep the bolt under tension so it will never rattle or move on its own.
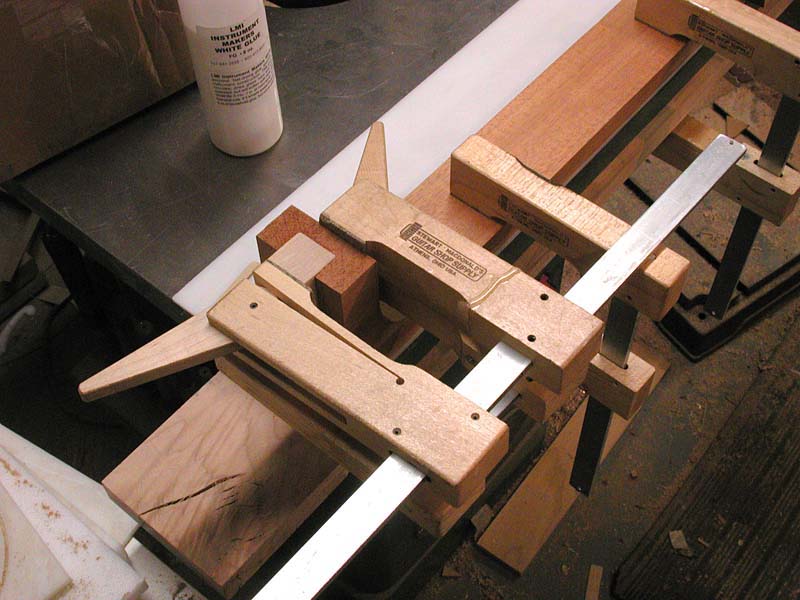
Gluing the spline in.
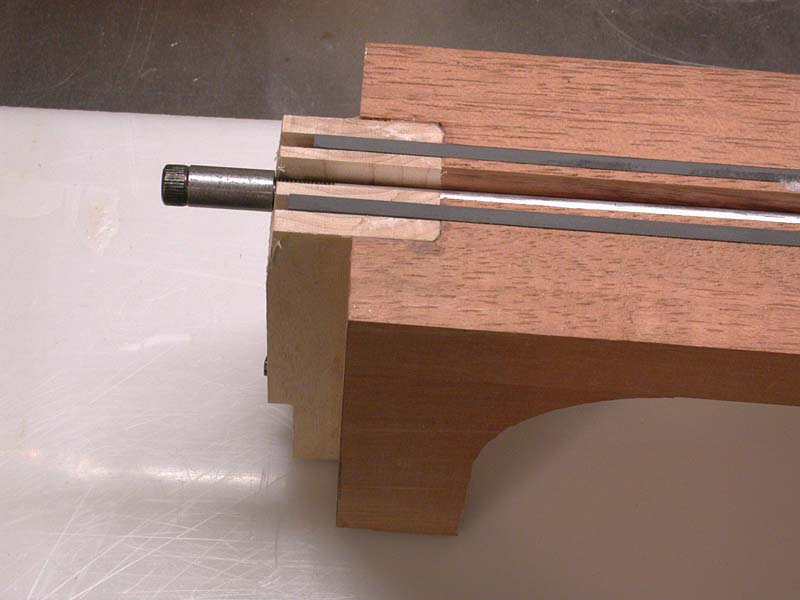
After the spline is glued, I cut the slots for the graphite bars and the truss rod on the table saw, cutting right through the spline.
The truss rod goes in its slot and a strip of wood is glued over it. The strip is scraped flush and the fretboard glued over that.
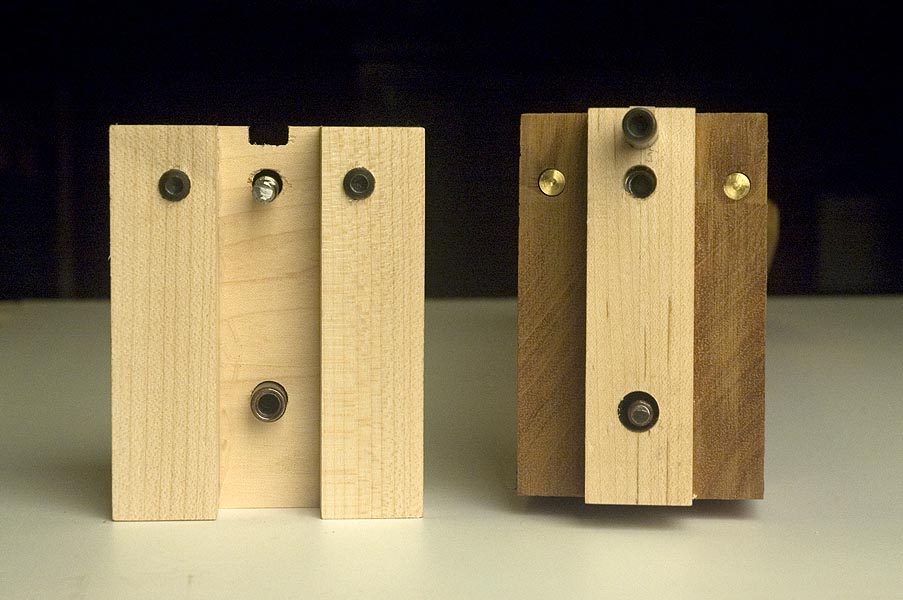
Here are the parts for the new neck block. The only real difference is the lower bolt, which is ground flat on both sides and let into a square slot so it can't rotate. And there's no hole drilled to access it since it can't rotate anyway. Note that after the neck block is assembled, I drill the two 17/64" holes for the 1" X 5/16" set screws that serve as the pivot points. The set screws are then simply screwed into the wood, which gives them a tight fit.
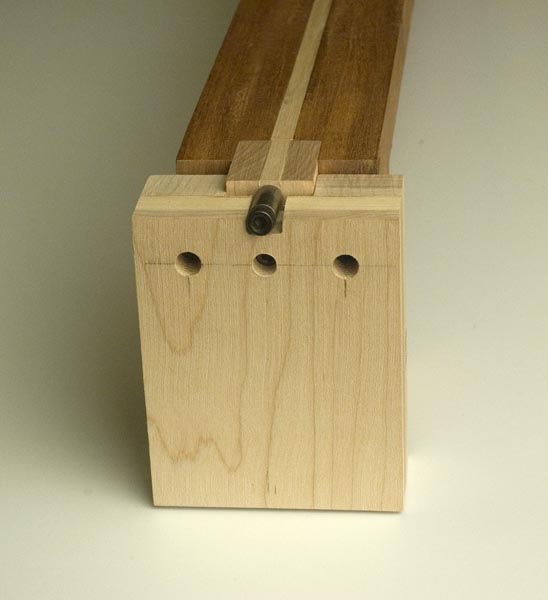
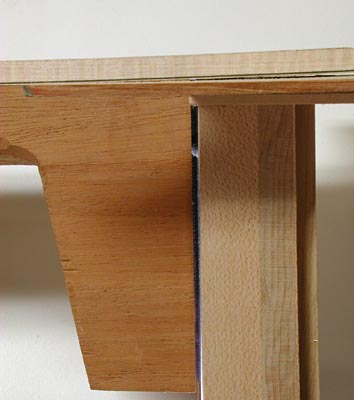
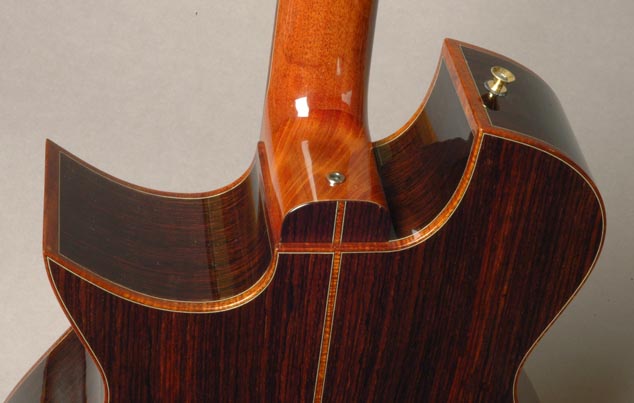
Here are several views of the assembled neck block and neck tenon. The first key point to notice is that the top neck bolt is in line with the two pivot points, allowing the neck to rotate around the top neck bolt. Also note the brass inserts in the neck tenon cheeks, which bear against the pivot points in the neck block. The bottom neck bolt pushes the heel in and out, changing the neck angle.
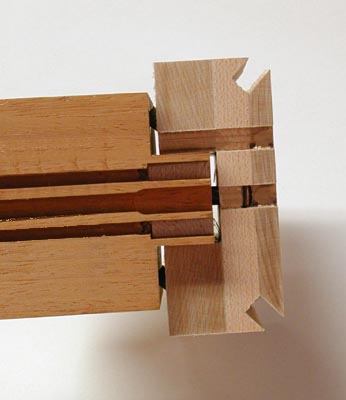
Here is a top view of the neck mounted to the neck block. You can see the top neck bolt in the center, going into the tenon where it screws into a barrel nut. On either side of the tenon, you can see the pivot points bearing into the brass inserts in the neck. The gap allows for adjustability, while the tenon is a tight fit in the mortise to register the neck from side to side.
Here is a side view of the neck mounted to the neck block. You can see how the fretboard angles up slightly from the top - note that in the finished guitar, the fretboard tongue is not glued town, but floats above the top with a graphite support finger underneath. In the gap between the neck and neck block, you can see one pivot point just under the top, and below that the barrel nut in the tenon for the lower neck bolt.
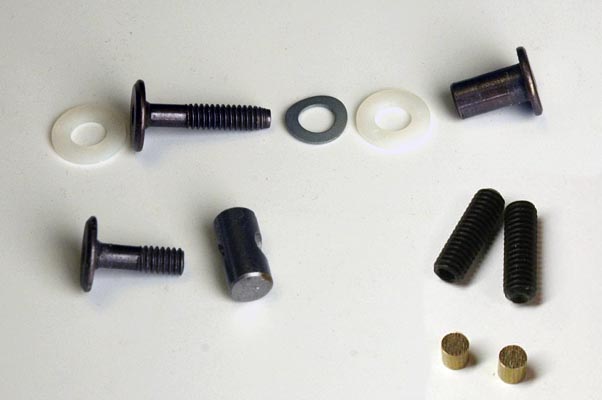
Here is all the hardware used. Top row: bottom neck bolt, wavy washer, nylon washers and t-nut. Bottom row: top neck bolt and barrel nut, pivot point set screws and brass inserts. The barrel nut, t-nut and neck bolts are the same furniture fasteners suggested by William Cumpiano, available online at http://profhdwr.com/specfast.htm. I saw the upper neck bolt short for my design. The wavy washers are 8mm diameter; the pivot points are 1" X 5/16" set screws; and the brass inserts are 1/4" lengths cut from 1/4" brass rod.
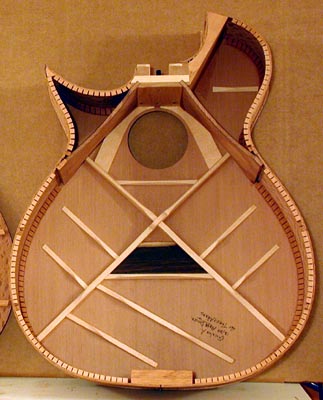
Here is a view of the inside of a guitar in progress, with the neck block installed:
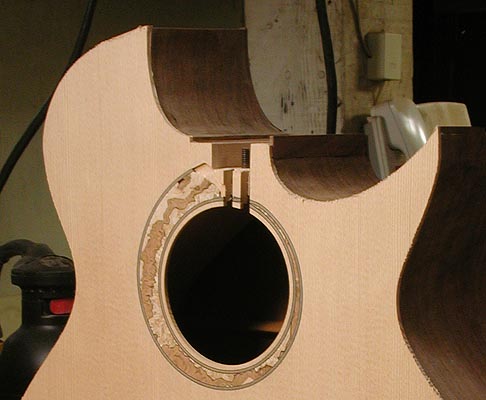
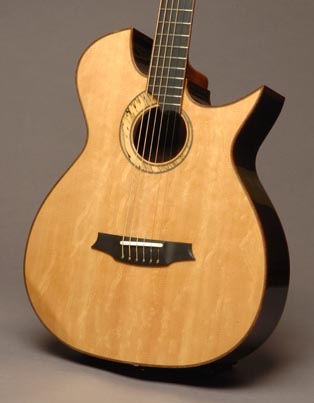
Here is an assembled guitar body. Note how the binding along the edge of the neck joint hides the gap. The neck is actually sitting in a 1/8" deep pocket, so the gap is hidden all around; adjusting the neck angle slides the heel of the neck in and out of this pocket.
Finally, here is a finished guitar, showing how the pocket hides the gap:
I've intentionally left out overall neck block dimensions here, since those will vary according to the design of various guitars. Moreover, the dimensions I have given are subject to the specific hardware I use, so be sure to measure your hardware before assuming these dimensions apply to your use. My intent here is to demonstrate the function of my system, so that others can adapt it to their own original guitar designs. |