Bent-Top Arm Bevel |
|
|
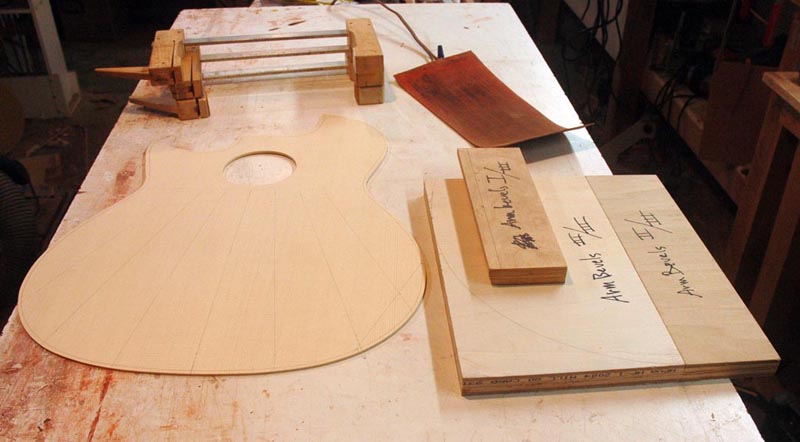
Here's how I do a bent-top arm bevel. There are really three parts to the process: bending the top, fitting the side, and binding. The top bending jig consists of three pieces of 3/4" plywood. The top piece is rounded on one long edge, and has a line drawn on top where the round starts on the bottom. The other two pieces just butt up against one another; the smaller one will be clamped to the table while the larger one will act as a lever to bend the top. A silicone heater blanket supplies the heat for bending. |
|
|
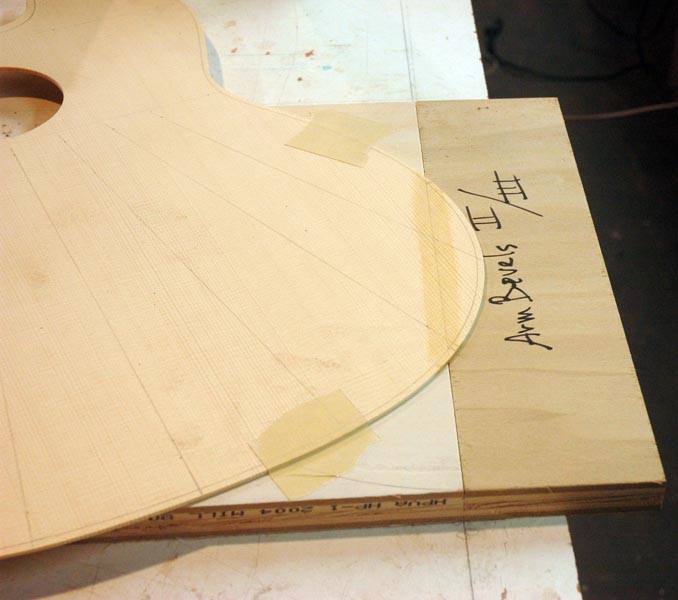
I draw a line on the inside of the top where I want the bend to happen. I tape the top down onto the larger bottom board with the line aligned with the butted edges of the two bottom boards. I smear a few drops of water along the line. |
|
|
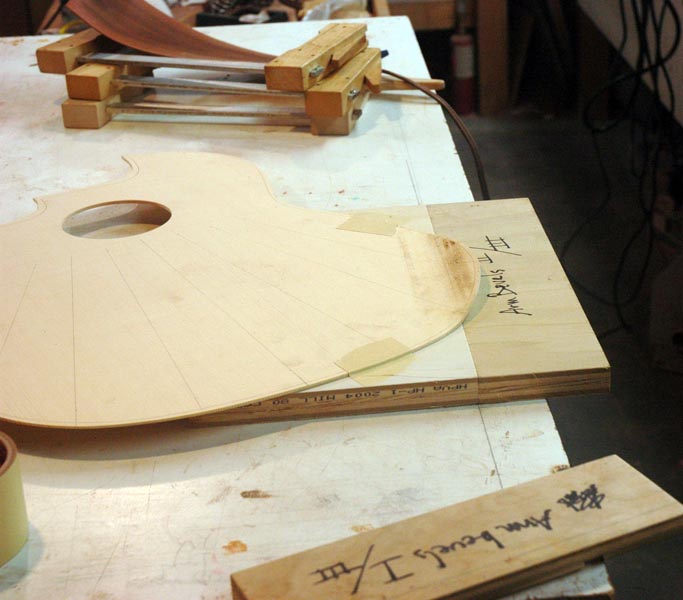
I plug in the blanket and let it get good and hot. Then I clamp it against the top with the upper board, aligning the lines so the rounded edge falls on the bend line. Then I just lift up the bottom board and slide something under it to hold it in place (a 2" roll of tape in this case). The top bends quite easily with the water and heat applied, it only takes about 10 seconds to push it all the way to a roughly 30 degree bend. Then I unplug the blanket and let the whole thing cool for a couple of hours. |

|
|
When it's completely cold, I unclamp the top, and voila, it's bent! A light sanding to remove the dirt and resin that came off the blanket and I'm ready to brace the top. |
|
|
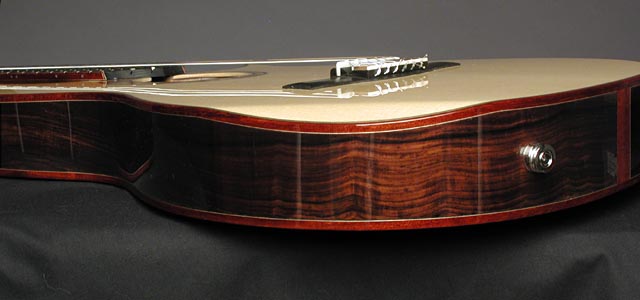
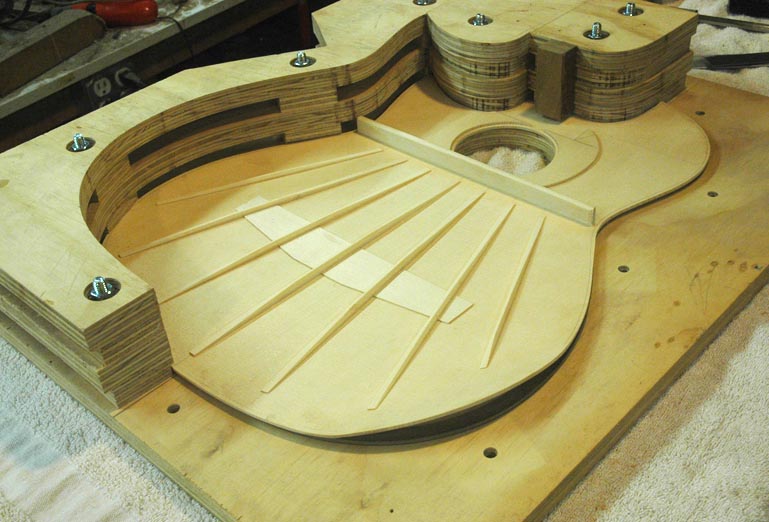
Here's the braced top in the mold with the bent edge at the front. |
|
|
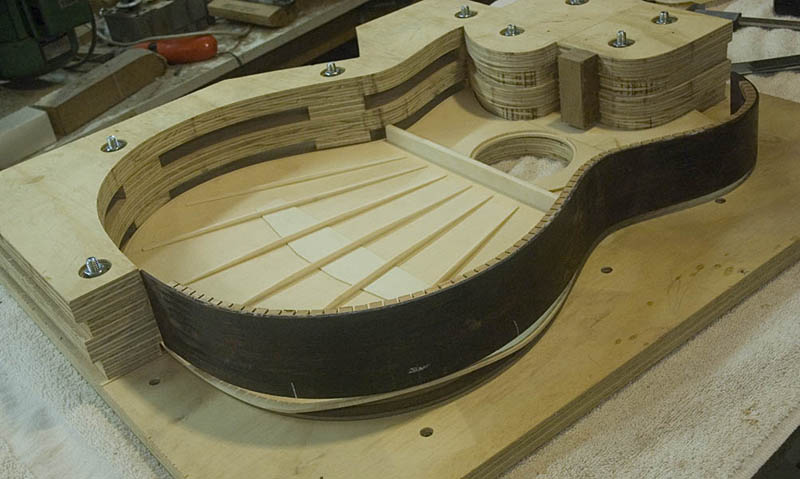
When I put the lined side on, it's obviously not going to fit the bend. |
|
|
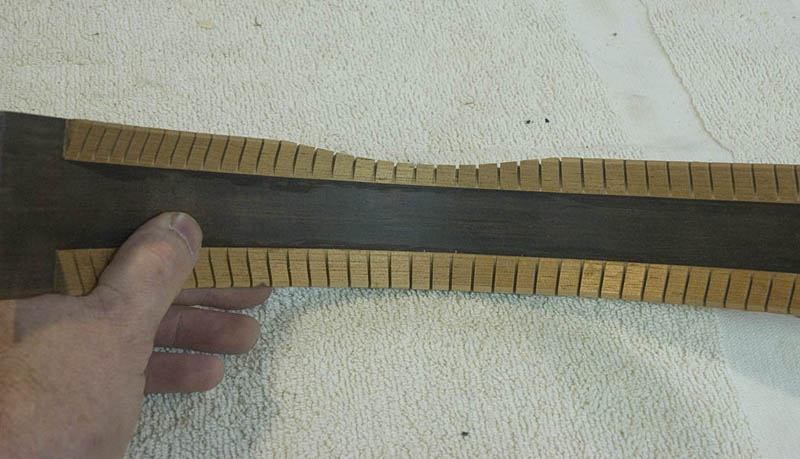
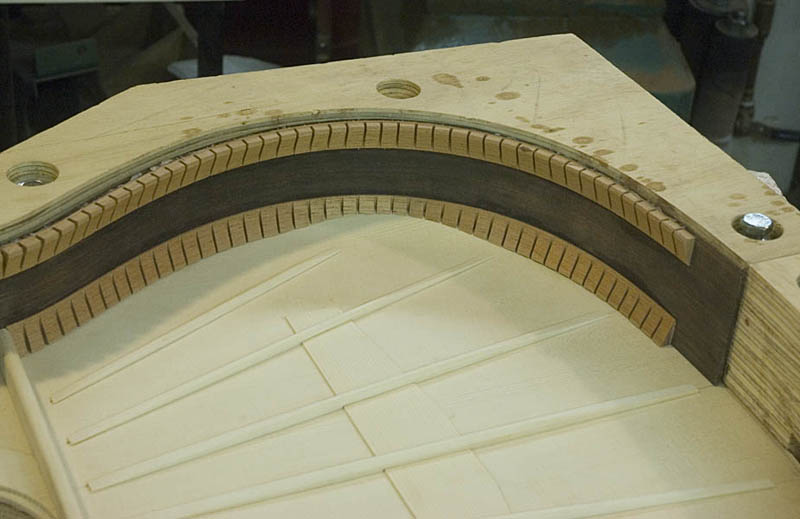
So, I mark on the side where the top bend starts and ends, measure how high it is at the highest point and mark that too, and sand the bevel into the lined side on the vertical belt sander. I round the ends of the bevel to match the shape of the bend in the top. |

|
|
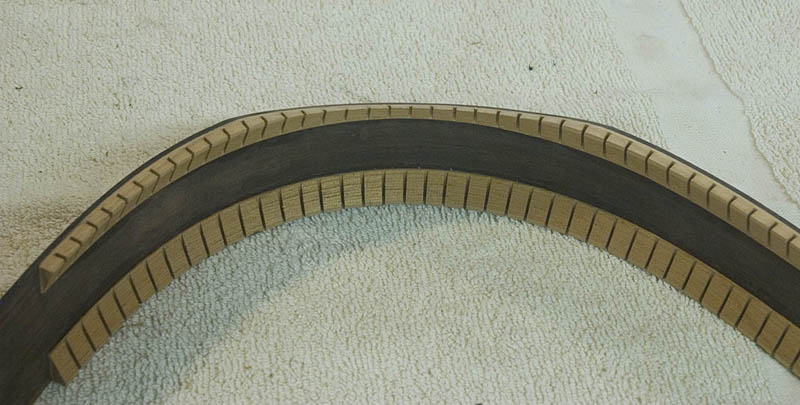
Here are a couple of views of the beveled side. There's still plenty of kerfed lining left to provide a good gluing surface. |
|
|
Now the side fits the top bevel perfectly, so I can proceed with assembling the body. |
|
|
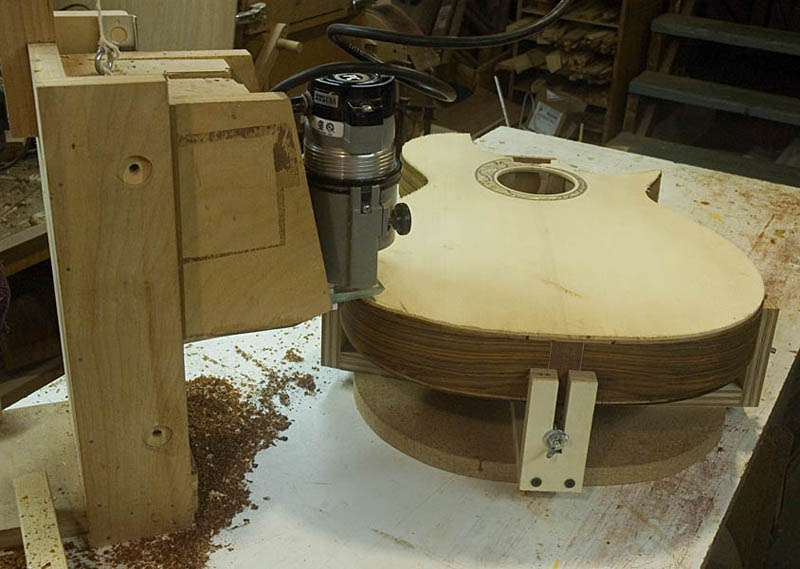
I rout my binding ledges as usual with my modified Ribeckki binding jig. But I go back and rout the channels about .025" deeper in the bevel. This is because the binding will look narrower in the bevel since it's beveled itself. |
|
|
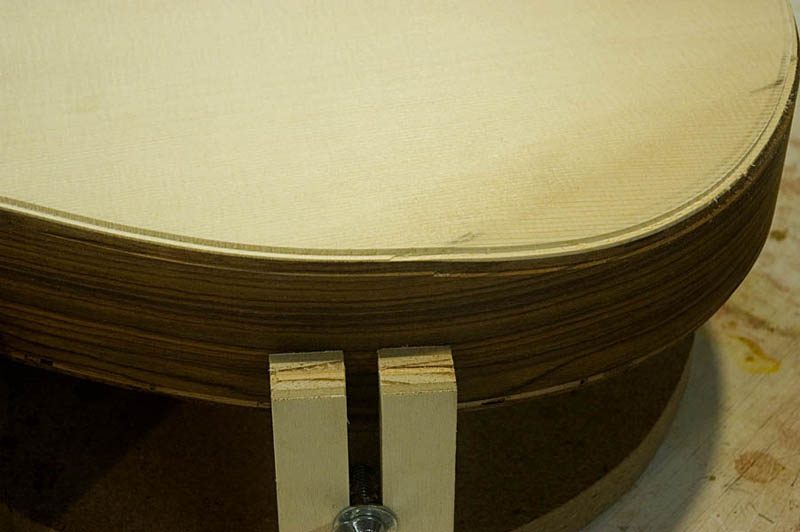
The deeper rout leaves a little step at both ends. I cut those into a smooth transistion with a sharp chisel. |
|
|
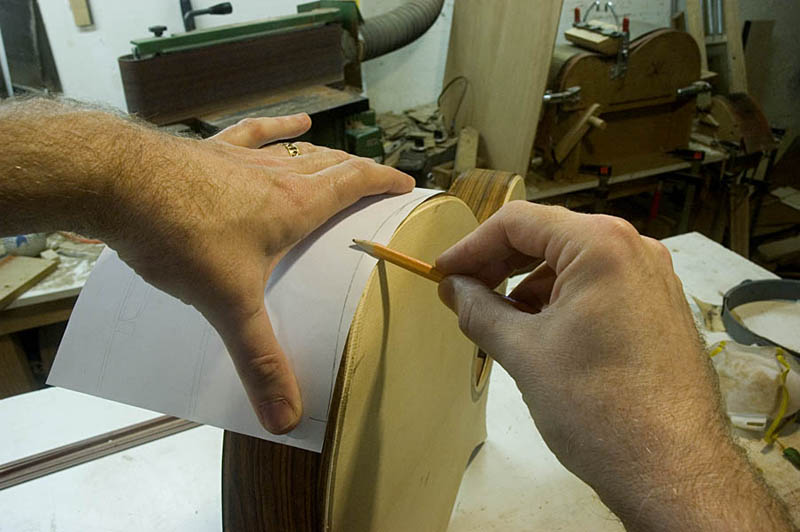
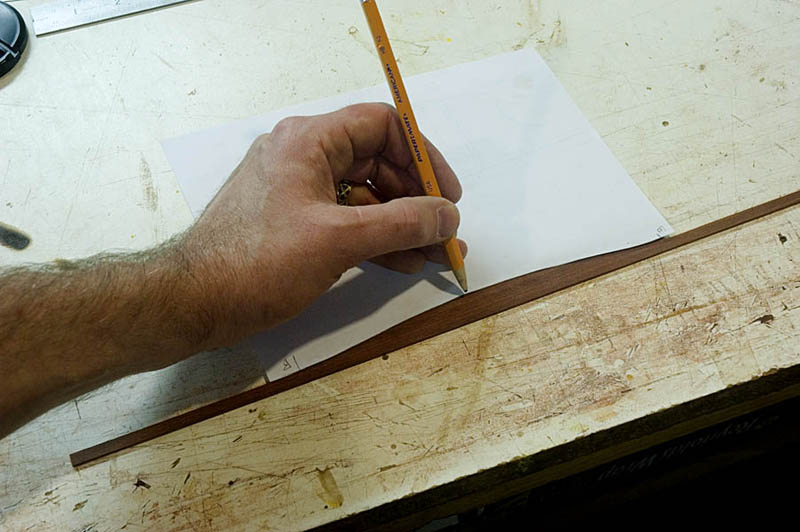
Now I trace the shape of the bevel onto a piece of paper. |
|
|
I cut an extra wide piece of binding material, about 5/8" wide, and cut it down to 1/4" everywhere except where the bevel will be. I transfer my tracing to that part and cut the bevel into the binding piece. |
|
|
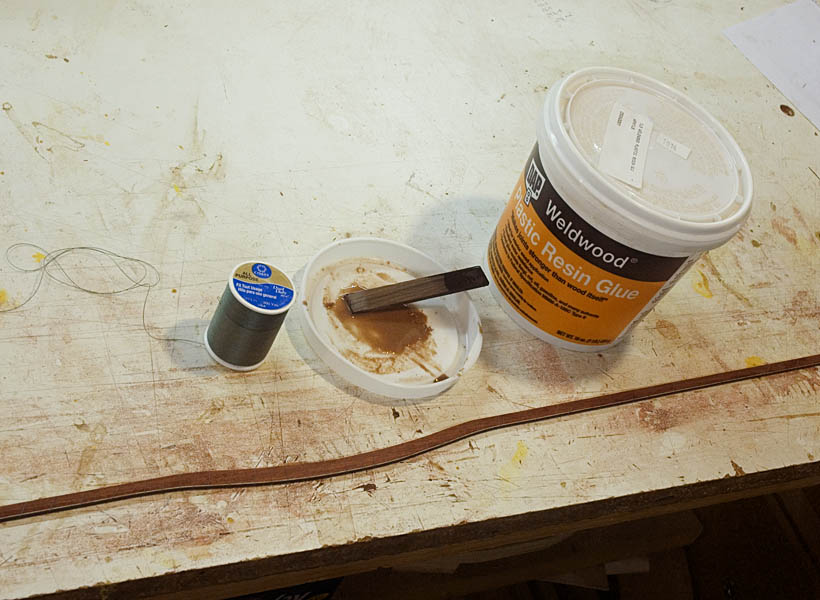
With the bevel shape cut into the binding, I glue my purfling to the edge of the binding with Weldwood Plastic Resin Glue, wrapping it on with thread. This glue will not release with heat, so my purflings stay glued when I bend the binding. Now I can bend the binding and glue it in place just like the other pieces. |
|
|
|
E-Mail Me
or call (503)688-3376