Cutting a Fanned-Fret Fretboard
|
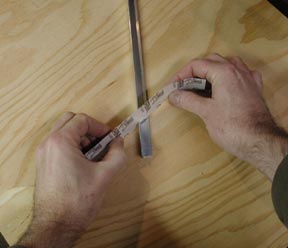
Here's a simple method for accurately slotting a Fanned-Fret fretboard using standard fretting templates. I made two saw guides out of 1/2" aluminum angle stock, slotting one edge of each on my table saw to the two different scales, using my usual Stew-Mac blade and templates. Then I double-stick taped them to the fretboard and sawed the slots with a backsaw, using the slots in the aluminum to guide the saw. I chose my two scales and purchased plexiglas templates for them to fit my Stew-Mac fretting setup. Then I made a dummy fretboard to allow me to slot the aluminum pieces using that same setup. The dummy fretboard is made out of scrap which is 1/4" thick along one edge and 1/2" thick along the other edge edge. I attached one of the fretting templates to the 1/4" edge with double-sided carpet tape, taped the aluminum to the 1/2" edge, and slotted the leading edge of the aluminum to a depth of 5/16". I slotted the other aluminum piece with the other scale template in the oposite direction, since it will go on the oposite side of the fretboard: |
||

|
 |
|
|
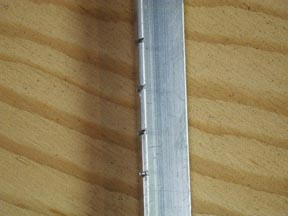
These slots will fit a fretting backsaw nicely when perpendicular, but as you go away from perpendicular the saw will tend to bind in the slots. I ran a strip of sandpaper through the slots to angle them just enough to let the saw slide through: |
||
|
|
|
|
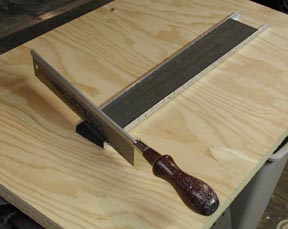
Then I taped the guides directly to the edges of the fretboard, which is already tapered to final dimensions, and taped the whole assembly to a board so I could clamp it to the table. (Note: it's important to taper the fretboard to final dimensions before slotting. This will help assure accurate intonation.) The fretboard itself has become a multi-angle miter box. Now I just saw each slot, letting the aluminum pieces guide the saw. Peel off the guides after slotting and you're done: |
||
|
||
|
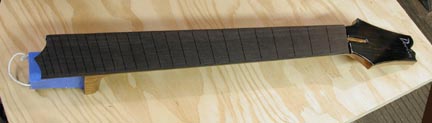
And here's the finished neck: |
||
|
||
|
E-Mail Me
|
||